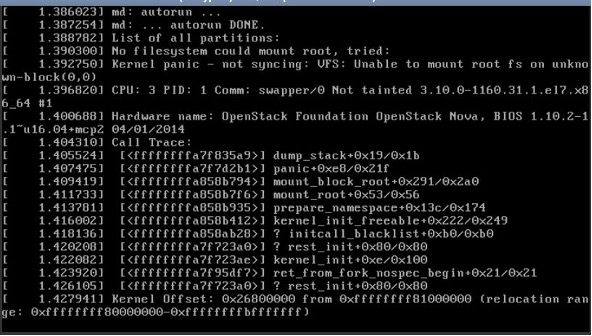
To fix this issue you should get the boot loader to rescue mode or single-mode to choose the available Kernel from the previous version or the backup one
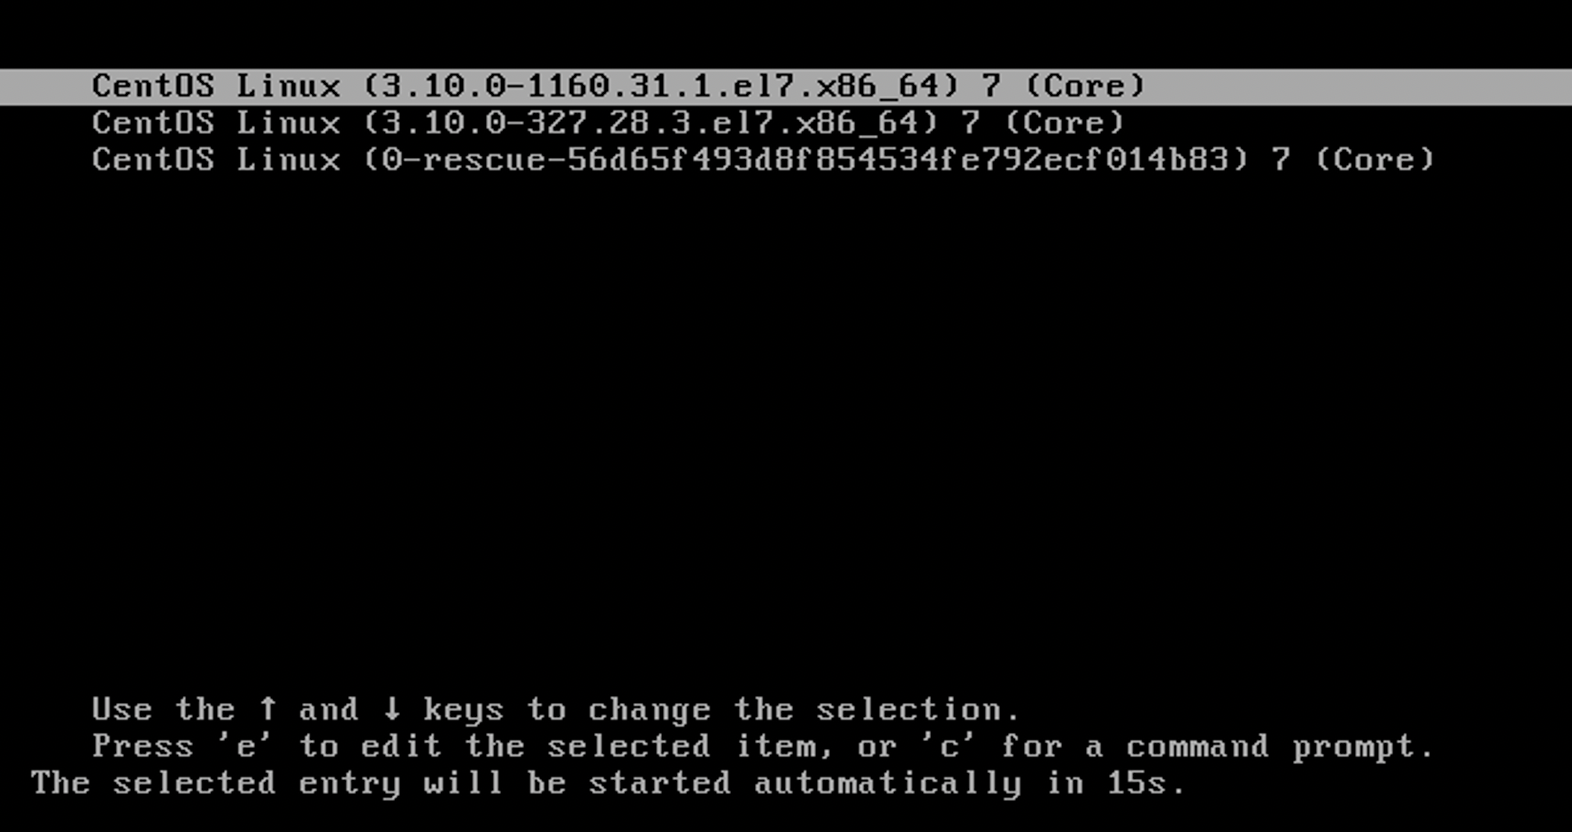
And, it’s hard to catch this screen while the time usually set to 1s only and the system will automatically choose the last updated kernel, so in this scenario, we have to find a way to fix panic/damage VM by using a workaround solution.
Solution:
1. Take a snapshot from your corrupted Volume [Tested in Centos7].
2. Mount the volume in the new VM.
- Verify which name the new disk has taken, by running the following:
fdisk -l
- Mount the new attached disk on /mnt
mount /dev/vdb1 /mnt
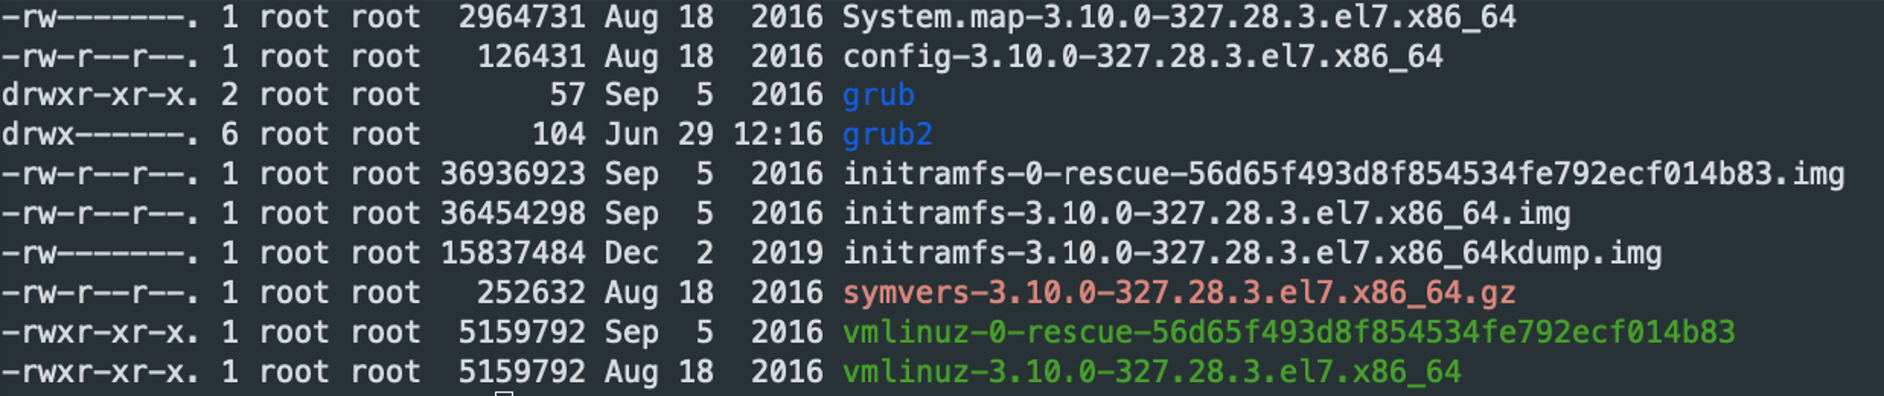
3. Run the following command to list all the files to see the available kernel.
cd /mnt/boot; ls
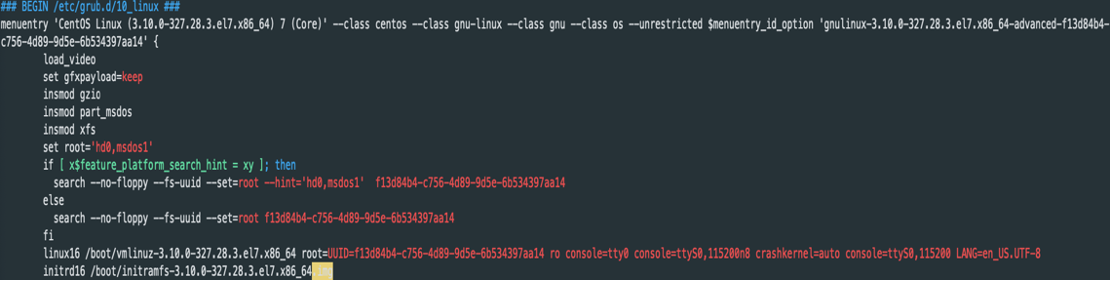
 4. Then move to mnt/boot/grub2 and edit the file (grub.cfg). You can use your favorite editor.
cd /mnt/boot/grub2
sudo vim grub.cfg
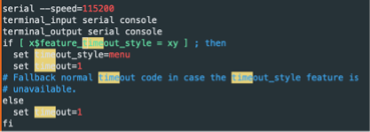
5. Adjust the set timeout to 20:
6. Edit the Kernel name with old Kernel name [ linux16 /boot/Kernel_name ], and the Kernel Image with the old Kernel image [ initrd16 /boot/Kernel_name.img ]. Refer to step3
7. Save the File and unmount the volume form the VM.
sudo umount /dev/vdb1
8. Launch a new VM with the volume.
9. Access VM from console, select the Kernel from the list and boot the VM with the old one.
10. Login to the server » All are set.