In this guide, we will configure an additional interface for an instance deployed on OpenStack for CentOS 7 as well as Ubuntu 16.04 machines deployed on Bluvalt Cloud.
There are two sections of this activity. where the first section is to attach the interface from OpenStack to the instance and choose the preferred network.
The second section, which we will be discussing here is how to configure the IP address to a CentOS/Ubuntu instances.
First of all, we have to get the interface name by running the command:
ifconfig -a
Expected result [On CentOS]
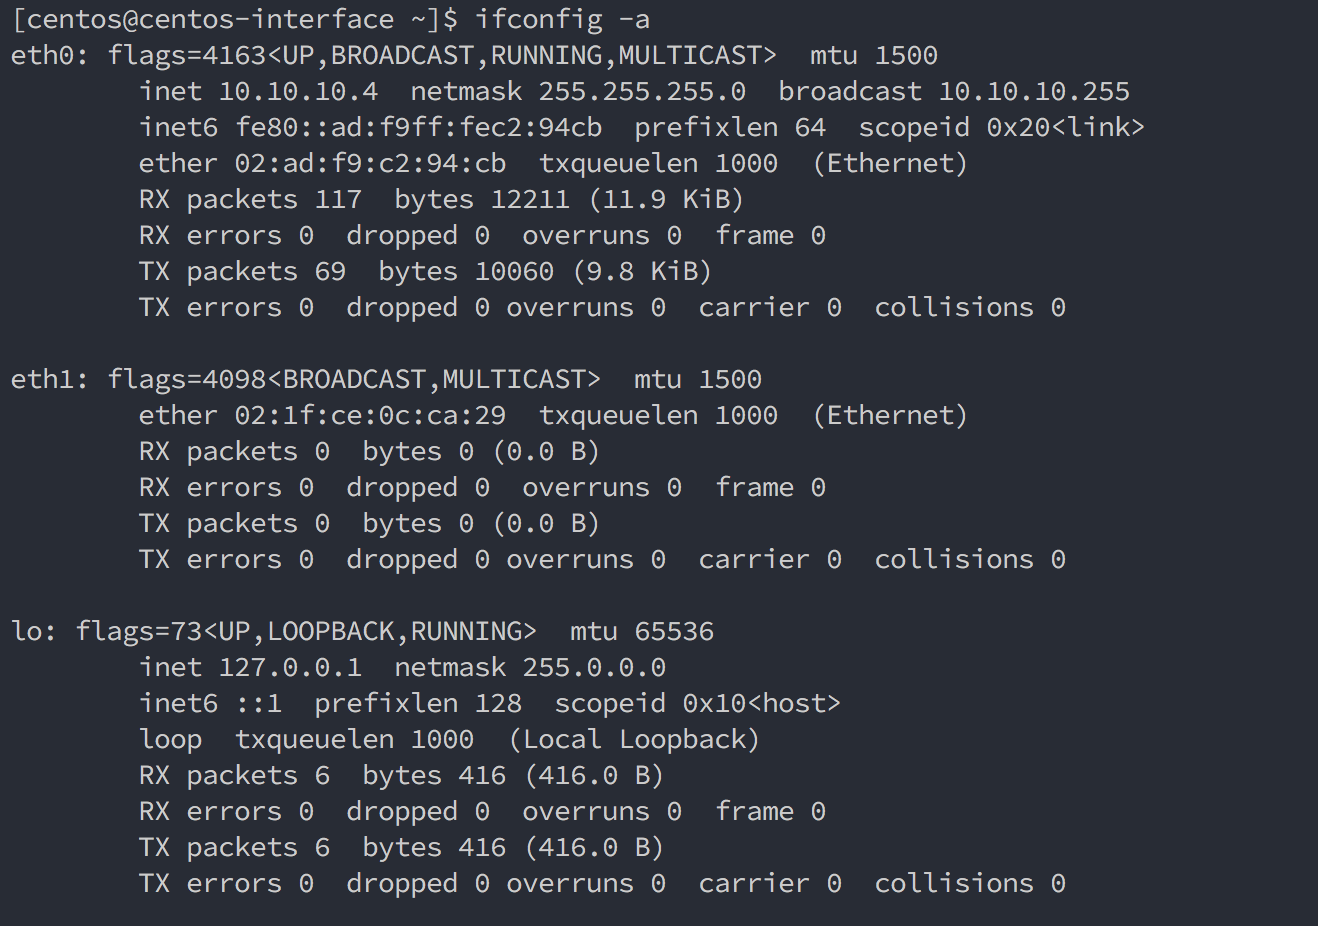
As we can see in the figure above is that we have three interfaces.
eth0: the primary interface which we are connected to and has the IP address 10.10.10.4
eth1: the second interface which we are intending to configure.
lo: loopback interface.
Expected result [On Ubuntu]
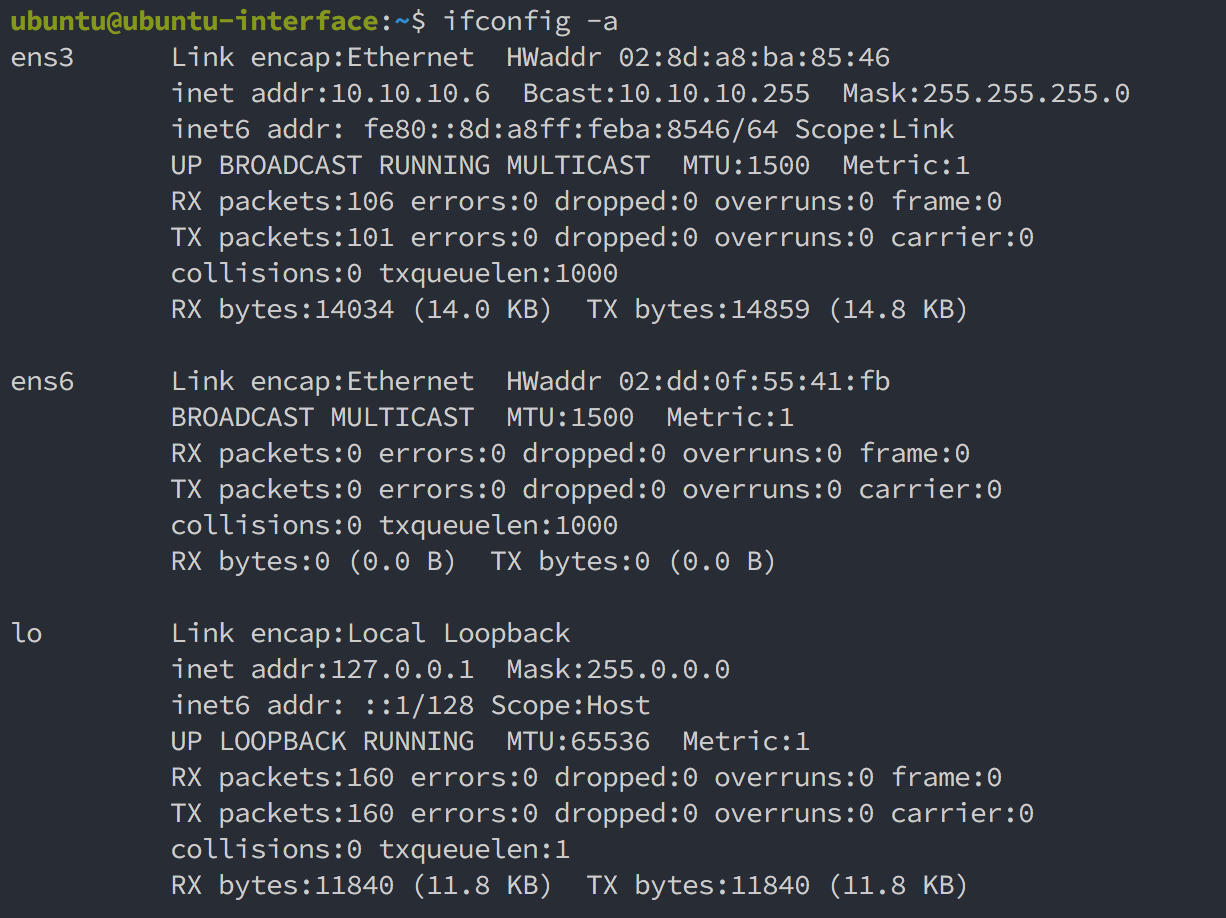
ens3: the primary interface which we are connected to and has the IP address 10.10.10.6
ens6: the second interface which we are intending to configure.
lo: loopback interface.
Now, We have the information we need. interface name
[On CentOS] machine, navigate to network-scripts directory
cd /etc/sysconfig/network-scripts/
use your favorite editor to create a new file and open it, in this example vi ifcfg-<interface name>
sudo vi ifcfg-eth1
paste the following lines in the newly created file, HINT: change the values of DEVICE respectively. when changes are done, save and exit
### Added manually to assgin IP address to a seconed interface ###
BOOTPROTO=dhcp
DEVICE=eth1
ONBOOT=yes
TYPE=Ethernet
DEFROUTE=no
[On CentOS] To activate the changes, let’s bring the interface down and up again
sudo ifdown eth1 && sleep 2 && sudo ifup eth1
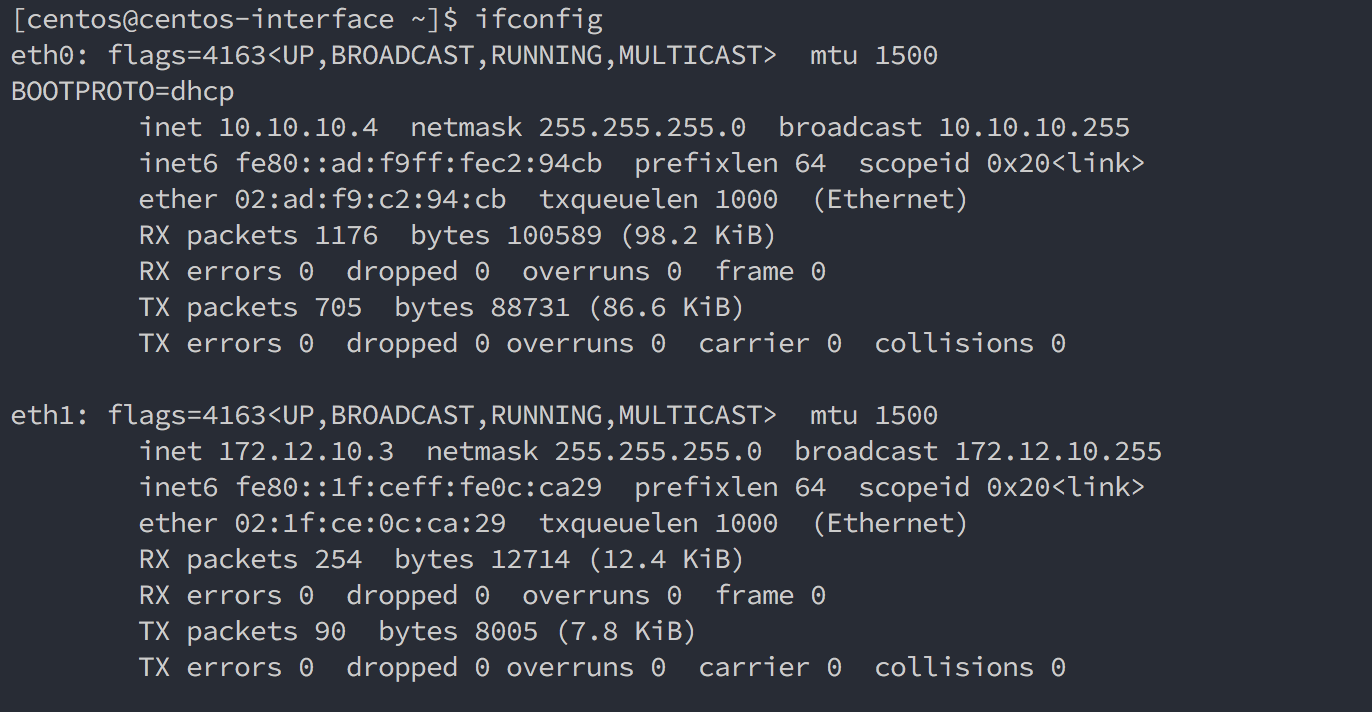
Now, run ifconfig again to check the newly activated configuration
CentOS:
[On Ubuntu] machine, navigate to network interfaces directory
cd /etc/network/interfaces.d/
[On Ubuntu] use your favorite editor to create a new file and open it, in this example vi <interface name>.cfg
sudo vi ens6.cfg
paste the following lines in the newly created file, HINT: change the values of auto <interface name> respectively. when changes are done, save and exit
### Added manually to assgin IP address to a seconed interface ###

auto ens6
iface ens6 inet dhcp
dfroute no
To activate the changes, let’s bring the interface down and up again
sudo ifdown ens6 && sleep 2 && sudo ifup ens6
Now, run ifconfig again to check the newly activated configuration
Ubuntu:
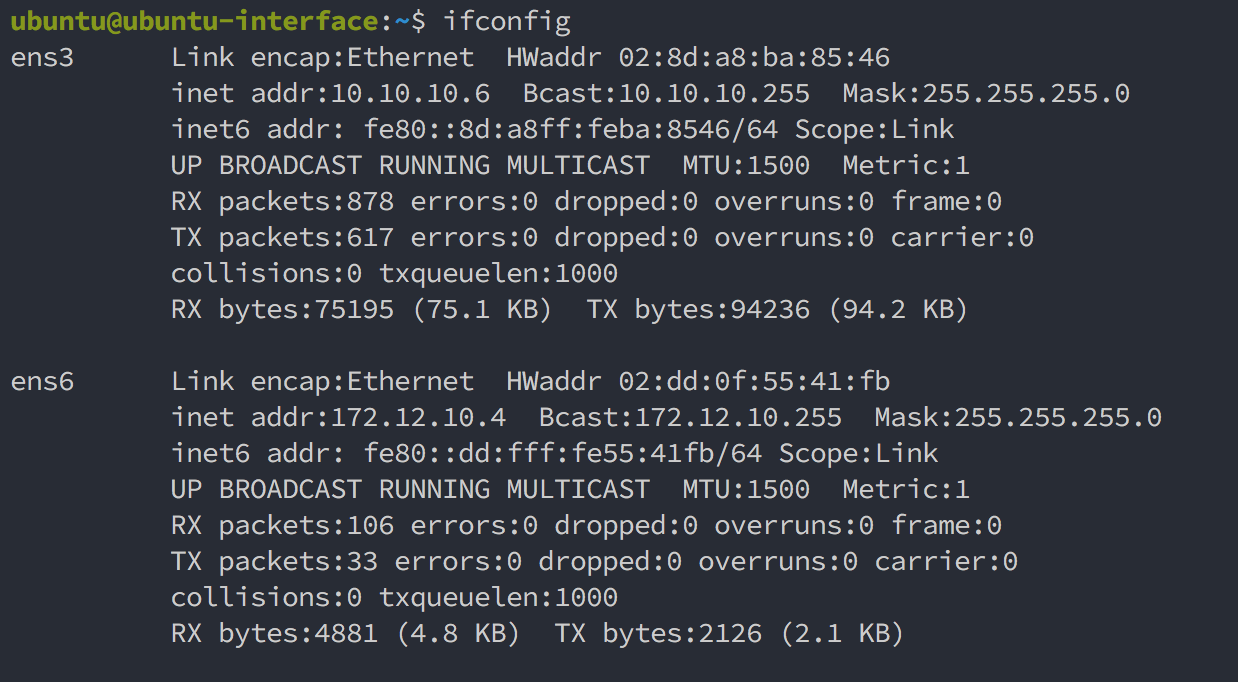
As we can see in the above figures, our newly created interfaces is up and running with the newly assigned ip address that was obtained from dhcp.