There are two ways to create resources in Openstack, a graphical user interface by using the Horizon dashboard, and the other way is by using CLI access.
1- Create required networks and subnets:
For our example, we need one network only.
To get API access, please follow the KB Click here.
a- Creating Needed Networks:
Create the network using command:
openstack network create <NET_NAME>
b- Creating Corresponding Subnets:
Create a relative subnet using command:
openstack subnet create <SUBNET_NAME> --network <NET_NAME> --subnet-range <X.X.X.X/X>
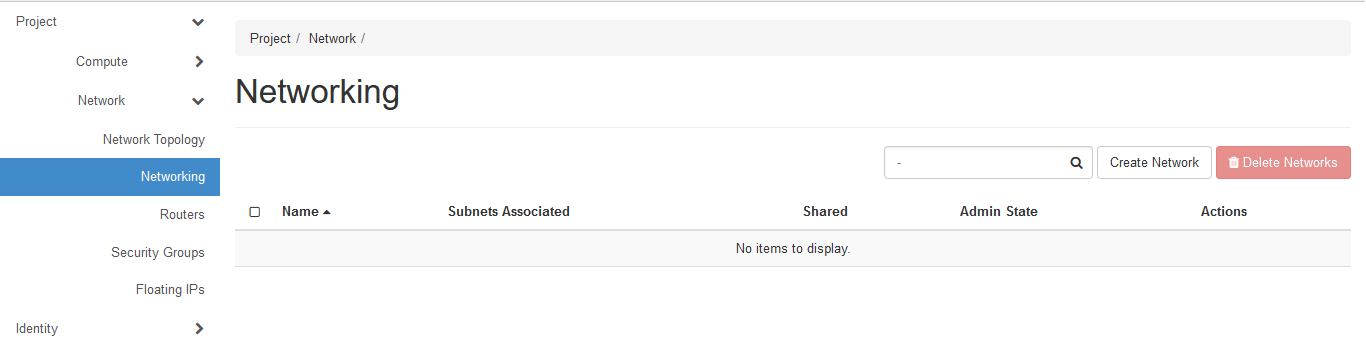
Using the graphical user interface to create the needed networks and subnets.
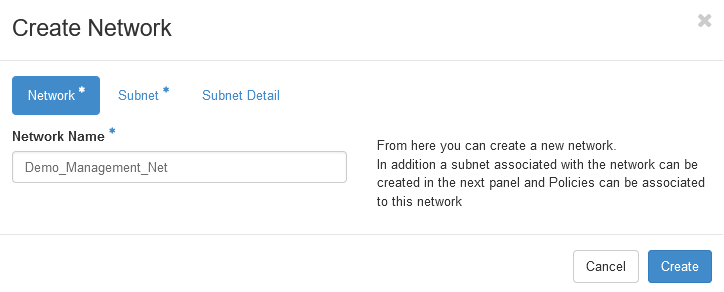
Go to Network => Networking => Click on Create Network
Give a network name
Give the subnet name and network address
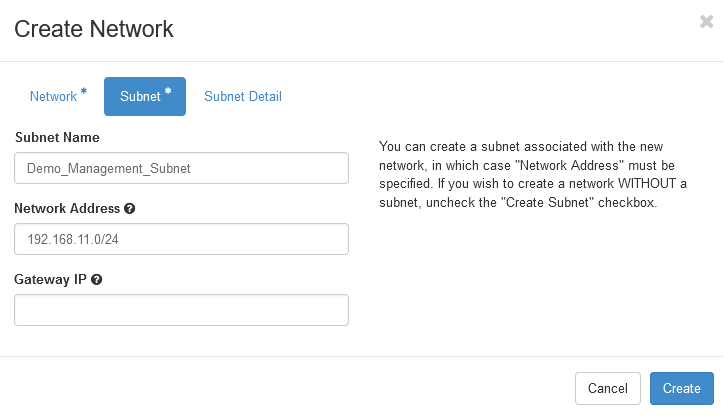
Then click create.
Repeat the above for any needed networks and subnets.
2- Creating Openstack Router:
Create a virtual router:
openstack router create <ROUTER_NAME>
Add router to needed subnet:
openstack router add subnet <ROUTER_NAME_OR_ID> <SUBNET_NAME_OR_ID>
Link the router to the external provider network:
openstack router set <ROUTER_NAME> --external-gateway <EXTERNAL_NETWORK_ID>
Note that, external network ID for RUH2 is
c975f064-d2b8-413c-9493-981f68bf887a, and for JED1 is80e37cda-1762-4d98-8e55-df3e33710295
You can also use the Horizon dashboard to create the needed router.
Go to Network => Routers => Click on Create Router
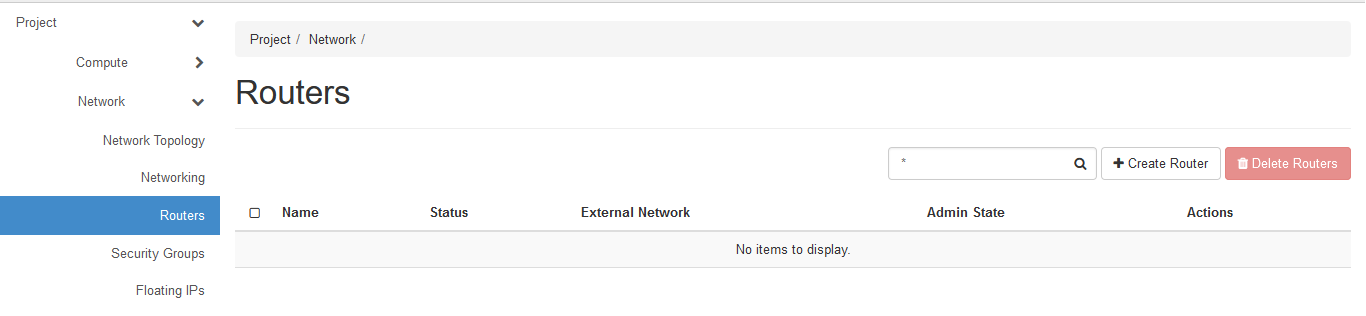
Give the Router name and click Create.
Now, after creating the router, you will need to set the router as an external one, to do that just click Set Gateway, then select the External Network
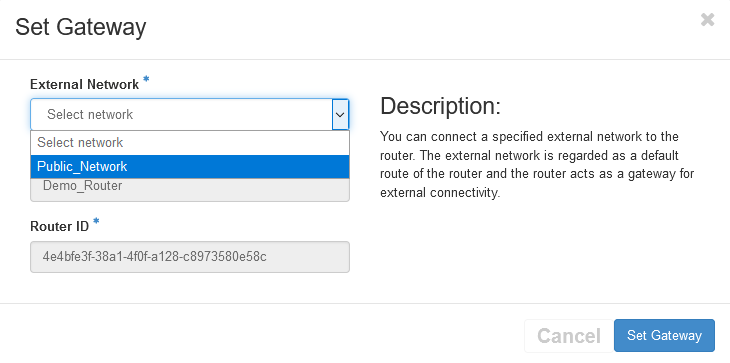
Again click Set Gateway
The next step is to add an interface to the created router from any needed subnet.
Click on the router name.
Click on Add Interface
Select the Subnet, and optionally you can select the IP Address.
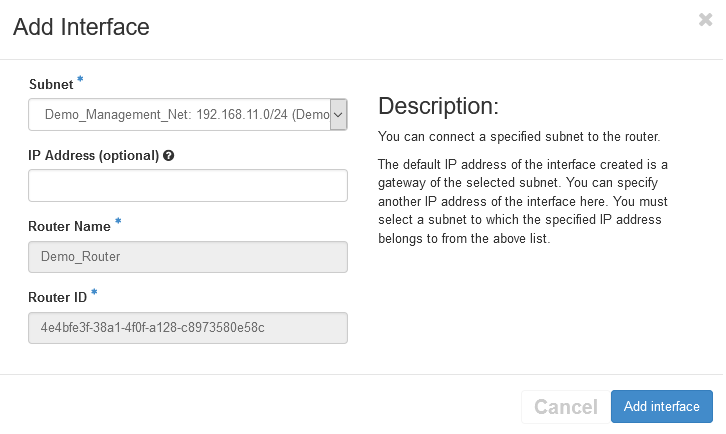
Then click Add Interface
3- Creating Security Groups:
The next step is to create a security group. You can create a security group from GUI or from CLI.
a- From CLI:
openstack security group create <SEC_GROUP_NAME> --description "Security Group"
Add needed rules:
openstack security group rule create <SEC_GROUP_NAME> \
    --protocol tcp --dst-port 443:443 --remote-ip 0.0.0.0/0
b- From GUI:
Got to Network => Security Groups => Click Create Security Group
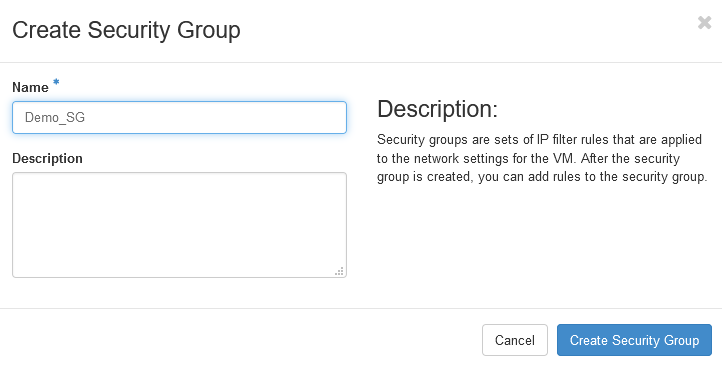 Give the security group name and click
 Create Security Group
Click Manage Rules

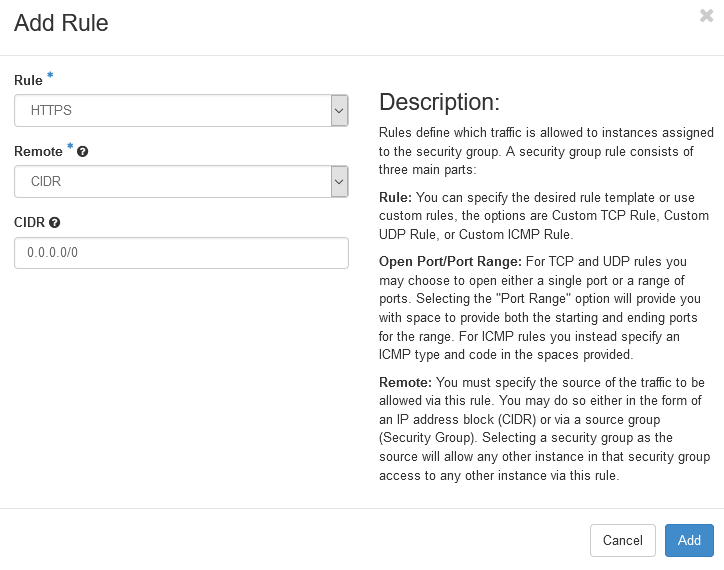
Click Add Rule
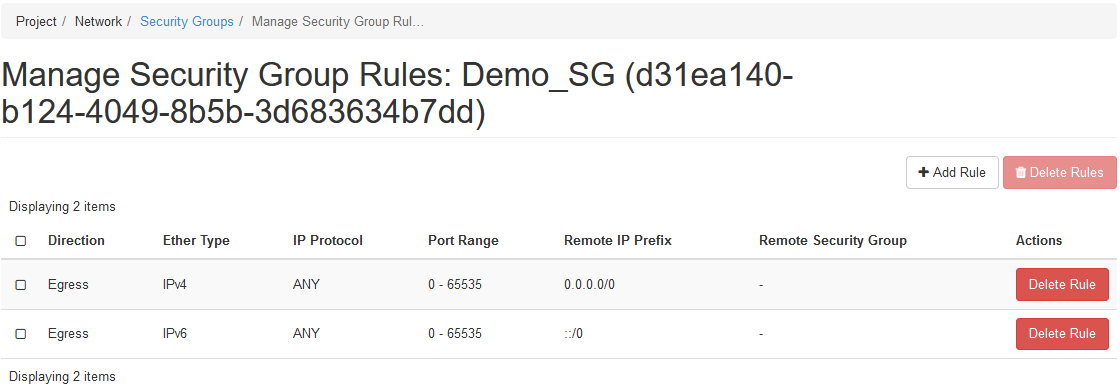
Add select HTTPS
Add any additional needed rules
4- Creating an Instance:
Now, we will create an instance.
a- From CLI:
Use the following command to create the instance:
openstack server create \
    --flavor <FLAVOR_NAME> --image <IMAGE_ID> --availability-zone <ZONE_NAME> --security-group default --security-group <SEC_GROUP_NAME> \
    --network <NET_NAME> \
    --boot-from-volume <VOLUME_SIZE> --max 1 \
    --wait <SERVER_NAME>
In this demo we simplify the code and used
--networkflag, for more advanced use cases, refer to the ‘–nic’ parameter.
b- Create the an instance from GUI:
Please follow this KB Click here